This article shows how to use your own icons to label places in maps that you make with the My Maps' feature in Google Maps.
 My Maps is a tool provided by Google Maps that lets you make a map showing a specific collection of places.


Click the button at the bottom labelled More Icons.
Hosting pictures outside of Google Photos / Picasa Web Albums
How to get shareable links to Google Photos
Why is this helpful? Well, you can search for a collection of places in regular Google Maps, and share the maps you can see - but if you do this, other people will see different places that are marked on the version of the maps that Google shows them, not the same as the places that are marked for you. To guarantee what set of places other people see, you need to make a map in My Maps, and then you can share this specific map.
My Maps provides a standard set of icons that can be used for labelling places - and these days it's a pretty impressive standard set. But it still doesn't include numbers, letters or other labels - and the icons provided may not be styled the way you would like.
Luckily Google have provided a way for you to use any icon to label points on a map you make.
How to use your own custom icon in a My Maps map
Make your map, and add the place(s) you would like to attach a custom icon to.
In the bar on the left hand side, hover your mouse over a place-marker which you want to assign a specific icon to.
The line for that item will highlight slightly, and a small colour / paint-tipping icon appear will to the right of the place description, like this:

Click on the paint-tipping / colour icon
This opens a small hover-window, where you can choose the colour or icon shape.
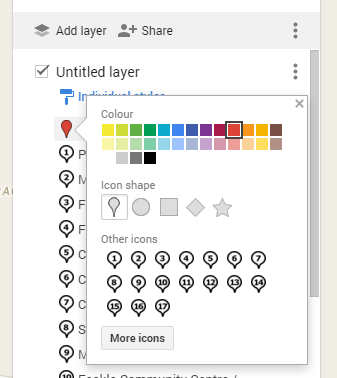
Click the button at the bottom labelled More Icons.
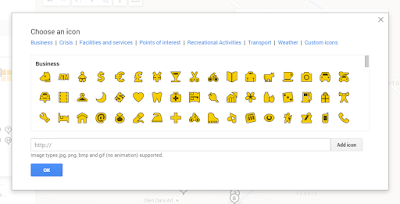
On the pop-up that opens, you are able to select an icon from one of the categories available (currently Business, Crisis, Facilities and services, Points of interest, Recreational Activities, Transport, and Weather). Don't select any of these.

Instead, at the bottom of the screen, enter in the URL (ie website address) of a file that you want to use as a marker. (.jpg .png .bmp, and .gif files can all be used).
Click Add Icon.
Click Add Icon.
This adds the picture that you linked to the list of items available under Custom Icons, and selects it.
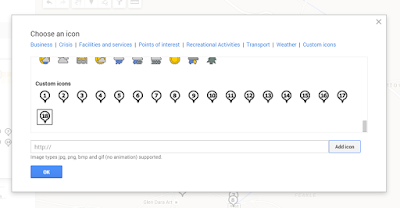
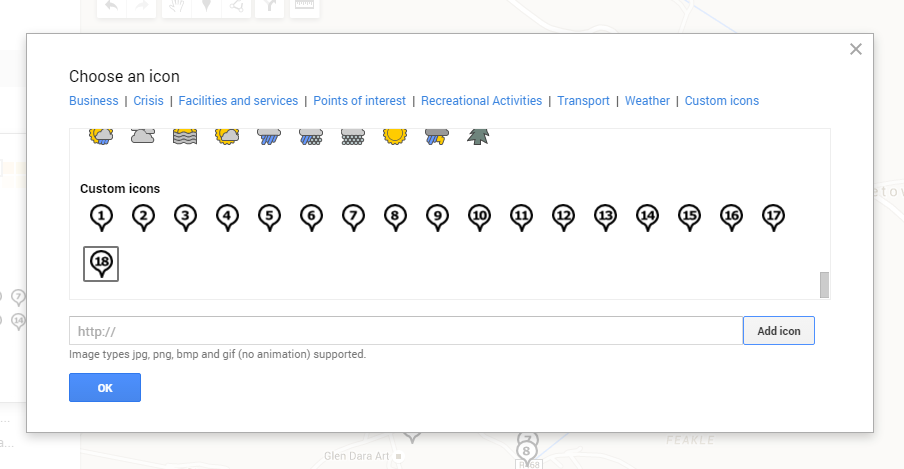
Click Ok to apply this icon to the point-marker that is being edited.
Job done! Your map now has a marker that is made from your own image.
Things to be aware of / Troubleshooting
- You need to load the image file to a file-host which handles picture files yourself: there is no option to load a file directly from the More Icons tab.
- The image file needs to stay, unchanged, in the place where you linked to - and that place has to be available to anyone who might look at the map: if you are sharing the map with "anyone in the world" then the markers need to be available like that, too.
- The image file should be small to speed up loading time: images in the set of markers I use are approx 2k each.
- Markers will be displayed in the same small size as Google's markers, ie 32x32 pixels: there's no point using a large, detailed photograph if it will shrunk down to so tiny that the details can't be seen.
- You must provide the actual URL of the picture you want to use as a marker, not the Google Photos shareable link. (Because the latter includes more than just the photo).
- I don't know any way to bulk-load many custom icons into a My Maps map at the same time. (There was a way to do this in the old Google Custom Maps, but this doesn't work in My Maps.) Or to make one icon available to many / all your your My Maps at once. If you have a solution for this, please leave a comment below.
- If you your icon background to be transparent, then you need to create it in RGB colour mode: Icons with a transparent background created in Indexed colour mode don't work.
Related Articles
File hosts: places used to store pictures used in BloggerHosting pictures outside of Google Photos / Picasa Web Albums
How to get shareable links to Google Photos
Comments
Post a Comment
Share or Leave Your Comment